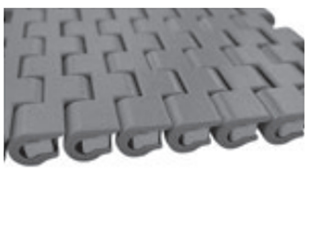
technical data Top chain handling
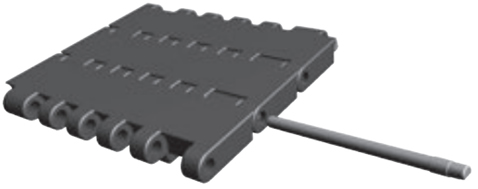
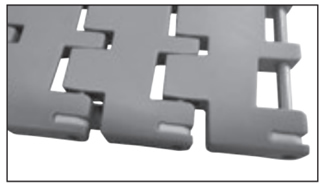
4-5. Handling Plastic modular chain
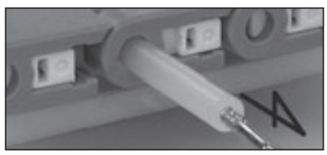
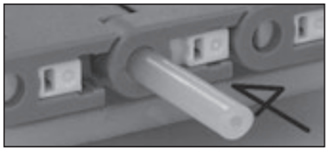
4-5-1. Disassembly and connection of WT0705-W and WT1510 series
- Slit pin type disassembly and connection
(WT0705-W50-SP, WT0705-W100-SP, WT1515-W50-SP, WT1515-W100-SP, WT1516-W50-SP, WT1516-W100-SP, WT1515G-M50-SP, WT1515G-M100-SP)
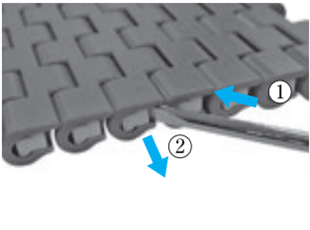
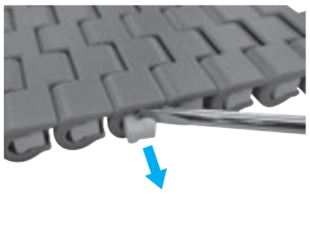
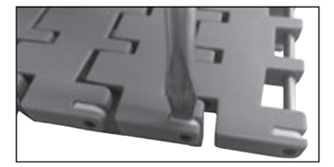
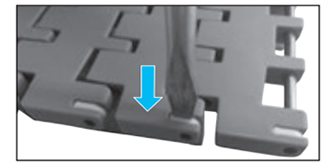
・Disassembly
(1) Place a thin-tipped flat-head screwdriver or similar tool behind the stopper part of the slit pin on the side of the chain, and while pushing forward, use it as a lever to pull out the stopper part.
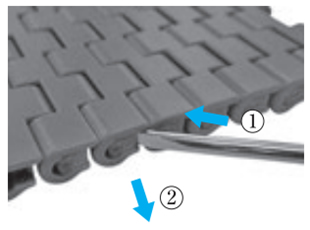
(2) Grab the stopper part that comes out and pull out the slit pin to disassemble the chain.

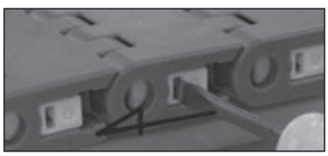
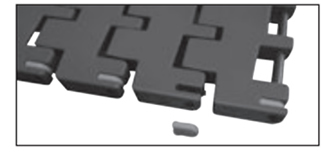
・Consolidation
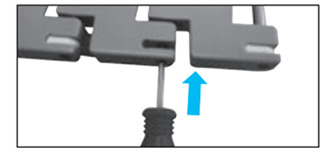
(1) When connecting chains, pull the chains together and insert the slit pin into one end.
(2) Pay attention to the orientation of the stopper and press it in until you hear a click.
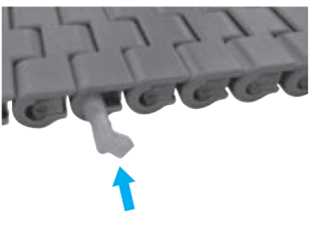
(3) Check that the slit pin is installed correctly.
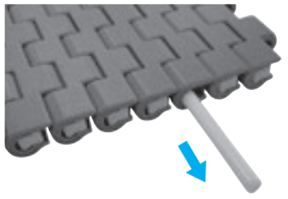
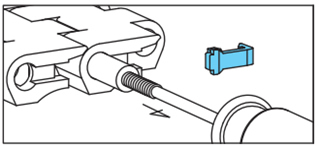
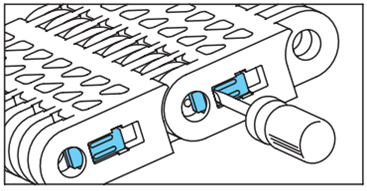
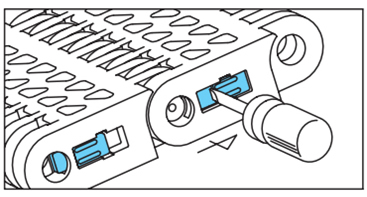
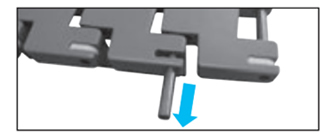
・Disassembly and connection of plug-in type
(WT0705-W type: width over 100mm)
・Disassembly
(1) Place a thin flat-head screwdriver (with a tip about 1.5 mm wide) on the plug on the side of the chain.
(2) Use a lever to remove the plug from the main unit, being careful not to let the plug fly out.
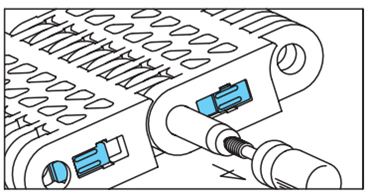
(3) Remove the plug on the other side of the chain in the same way as (1) and (2).

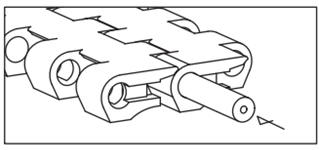
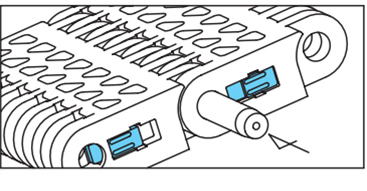
(4) Insert the bar into the pin hole on the side of the chain from the other side and push out the pin.

(5) Grab the pin that comes out and pull it out of the chain to disassemble it.
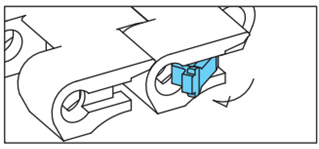
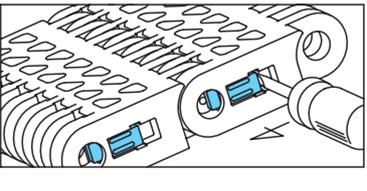
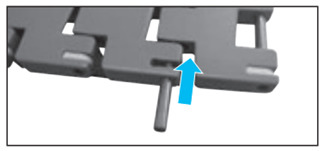
・Consolidation
(1) When connecting chains, insert the plug on the opposite end. Pull the chains together to join them, and insert the pin from one end.
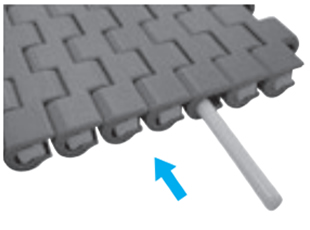
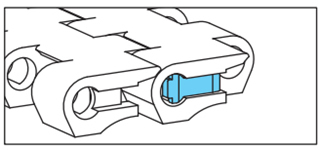
(2) Next, insert the plug to close the pin insertion section.
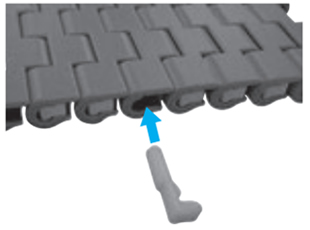
(3) At this time, pay attention to the orientation of the plug and push it in until you hear a click.
(4) Check that the plug is installed correctly.
Note: When connecting, please use the included or dedicated pins and slit pins.
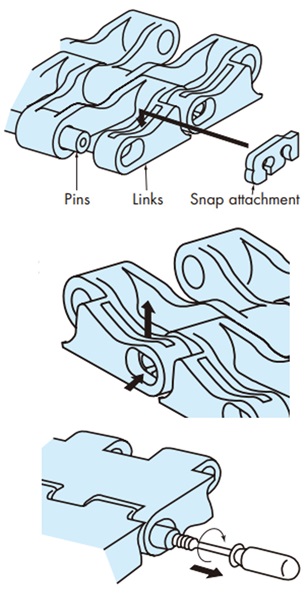
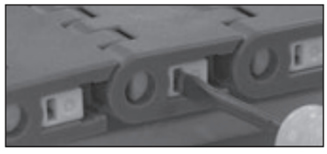
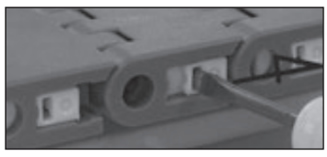
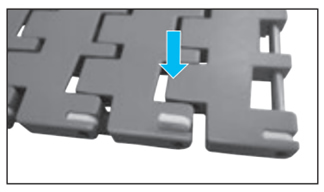
4-5-2. Structure and disassembly/connection of BTN5, BT6, and BT8 series
・Structure of both ends of the chain
To prevent the pins from coming loose at both ends of the chain, snap attachments are inserted from the back of the links (snap fit).
・Disassembly/connection instructions
- (1) Insert a thin, flat-head screwdriver into the gap (approximately 1 mm) between the link hole and the snap attachment to remove the snap attachment.
- (2) Rotate the screwdriver to insert it into the center hole (Φ1) of the pin, then pull out the pin and disassemble the chain.
- (3) When connecting chains, pull both ends of the chain together and insert the pin from one end. Insert the snap attachment from the back of the chain. Make sure that the snap attachment does not protrude from the underside of the link.
Note: When connecting, please use the included or dedicated pins.
4-5-3. Disassembly and connection of WT1500/1510/1900/2510/2520/2700/3000 series
・Disassembly
(1) Insert a flat-head screwdriver or similar tool with a tip of 2 mm or less between the plug on the side of the chain and the chain.
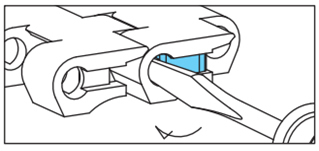
(2) Use a lever to remove the plug from the main unit, being careful not to let the plug fly out.
(3) Rotate the screwdriver to insert it into the center hole (Φ1) of the pin, then pull out the pin and disassemble the chain.
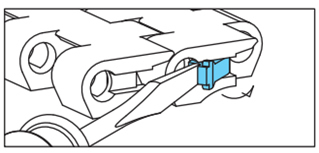
・Consolidation
(1) When connecting chains, pull the chains together and insert a pin into one end.
(2) Next, insert the plug to close the pin insertion section. Be careful to orient the plug correctly (so that the protrusion is facing the pin hole) and press it in until you hear a click.
(3) Check that the plug is installed correctly.
Note: When connecting, please use the included or dedicated pins.
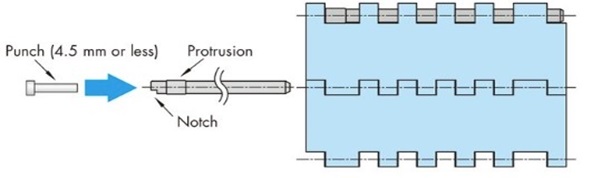
4-5-4. Disassembly and connection of WT2515G-M330/BTC8H-M type/BTM8H-M type
Note: The punch must have an effective length of 50 mm or more.
・When disassembling
Place a punch (Φ4.5 or less) on the side of the pin without the notch and hit it with a hammer to remove the pin.

・When connecting
Please use the dedicated joint pin (special stepped plastic pin, color: orange).
Insert the pin into the link from the side without the notch. After inserting the pin up to the protrusion, place a punch on the notched side of the pin and hit it with a hammer to connect.
It doesn't matter whether you insert the pin from the left or right side of the link.
・When reconnecting
Do not cut and connect the already inserted joint pin (special stepped plastic pin, color: orange).
・About joint pins (special stepped plastic pins)
When connecting, please use the dedicated joint pin (special stepped plastic pin).
The joint pin (special stepped plastic pin) is orange to distinguish it from the main body pin (white).
One connecting pin (special stepped plastic pin) is included with each chain.
4-5-5. Disassembly and connection of WT2500/WTM2530/WT3100/WT3820/WT3830 series and BTM8H type
・Disassembly
(1) Insert a thin, flat-head screwdriver or similar tool into the hole in the slide plug on the side of the chain.
(2) Push the flat-head screwdriver in the direction of the arrow to slide the slide plug.
(3) Rotate the screwdriver to insert it into the center hole (Φ1) of the pin, then pull out the pin and disassemble the chain.
・Consolidation
(1) When connecting chains, pull the chains together and insert a pin into one end.
(2) Next, slide the plug to close the pin insertion section.
Note: When connecting, please use the included or dedicated pins.
4-5-6. Disassembly and connection of WT3810/WT5700/BT16 series
・Disassembly
(1) Insert a thin, flat-head screwdriver or similar tool between the chain and the slide plug on the side of the chain.
(2) Push the flat-head screwdriver in the direction of the arrow to slide the slide plug.
(3) Rotate the screwdriver to insert it into the center hole (Φ1) of the pin, then pull out the pin and disassemble the chain.
・Consolidation
(1) When connecting chains, pull the chains together and insert a pin into one end.
(2) Next, slide the slide plug to close the pin insertion section.
Note: When connecting, please use the included or dedicated pins.
4-5-7. Disassembly and connection of WT3085-C type
・Disassembly
(1) Place a flat-head screwdriver on the plug on the top of the chain.
(2) Use a hammer to hit the flat-head screwdriver to remove the plug. Be careful not to let the plug fly off.
(3) Remove the plug on the other side of the chain in the same way as (1) and (2).
(4) Insert a round bar (less than Φ4) into the pin hole on the side of the chain to push out the pin.
(5) Grab the pin that comes out from the other side and pull it out of the chain to disassemble it.
・Consolidation
(1) When connecting chains, pull the chains together and insert a pin into one end.
(2) Next, insert the plug to close the pin insertion section.
(3) At this time, pay attention to the orientation of the plug and push it in until you hear a click.
(4) Check that the plug is installed correctly.
Note: When connecting, please use the included or dedicated pins.
4-5-8. Disassembly and connection of BTC4-M and BTO8-M types
・When disassembling
Place a punch (Φ2.5 or less) against the side of the D-pin on the D-hole side of the link, and lightly hit it with a hammer to remove the pin.
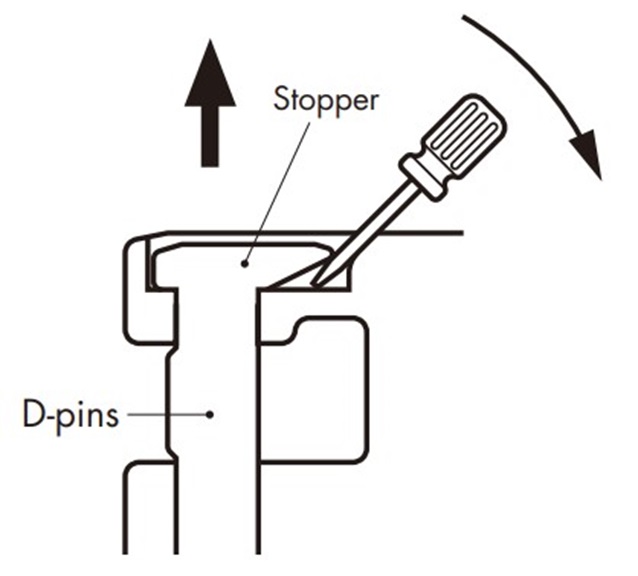
Alternatively, you can remove the pin from the stopper side using a thin flat-head screwdriver.
・When connecting
- (1) Please use the dedicated connecting D-pin (color: orange).
- (2) Check the insertion direction of the D-pin and insert the pin into the link.
- (3) Press the stopper side of the D-pin with your finger or lightly hit it with a hammer.
・When re-cutting and connecting
- (1) Do not cut and connect the connecting D-pin (color: orange) that has already been inserted.
・About connecting D-pins
- (1) When connecting, please use the dedicated connecting D-pin.
- (2) The connecting D-pins are orange to distinguish them from the main pins (white).
- (3) One connecting D-pin is included with each chain.

