technical data Cable Carrier (CABLEVEYOR)-Cable Carrier (CABLEVEYOR) Connection and Assembly
TKP Series
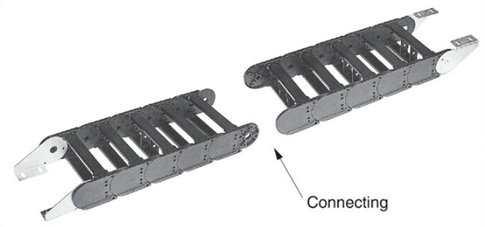
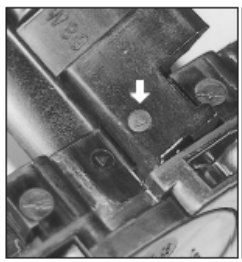
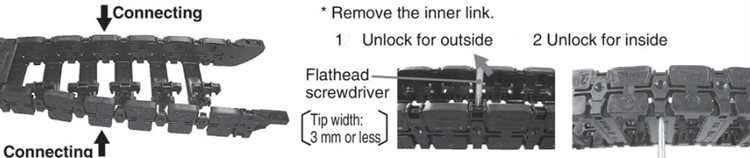
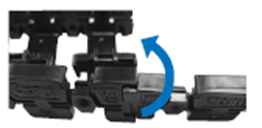
Concatenation
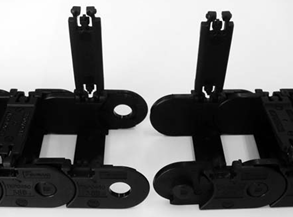
Remove the arms and align the direction.
Align the pin with the hole and press in.
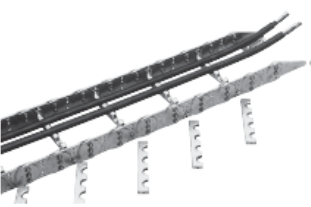
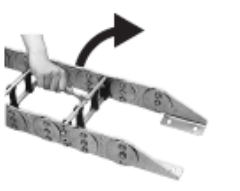
Cable and hose installation

After setting the cable hose, close the arm.
Detachment
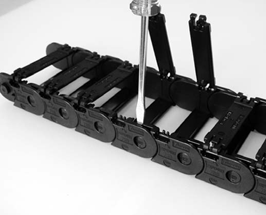
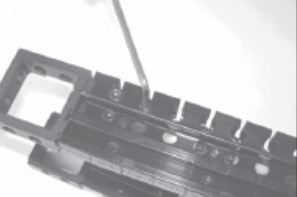
Insert a flathead screwdriver and rotate it 90 degrees or raise it to pry it out.
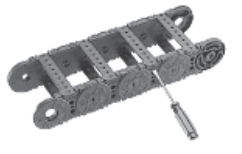
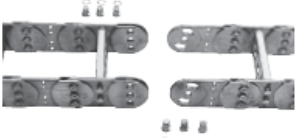
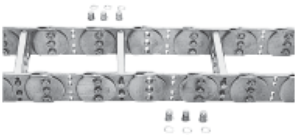
TKP62H42, TKP90H50, TKP125H74
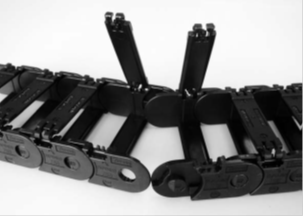
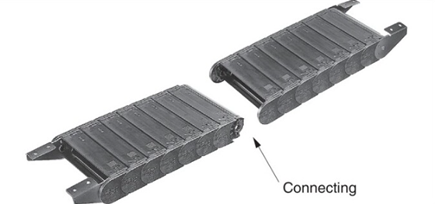
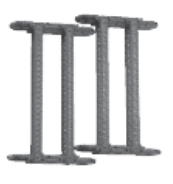
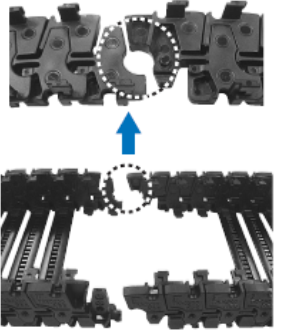
Concatenation
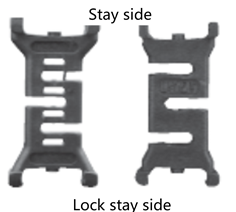
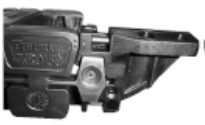
Remove 3 to 4 arms and lock stays from the connecting section.
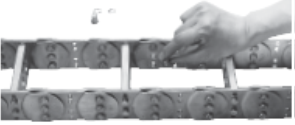
After connecting the links, attach the lock stay.

After setting the cable hose, close the arm.
Connection and assembly of the TKP Series varies depending on the structure. Be sure to refer to the respective Instruction Manuals.
TKC Series
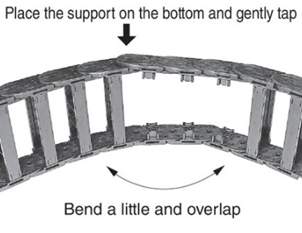
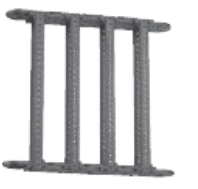
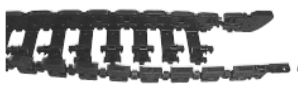
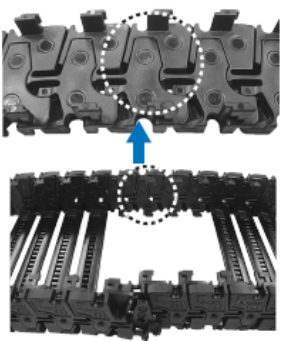
Concatenation
Remove 3 to 4 arms and lock stays from the connecting section.
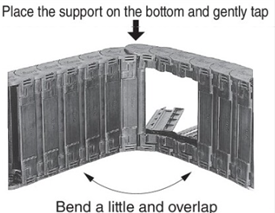
After connecting the links, attach the lock stay.

After setting the cable hose, close the arm.
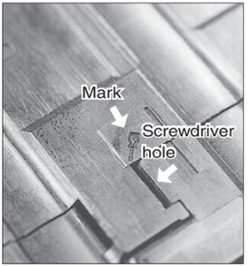
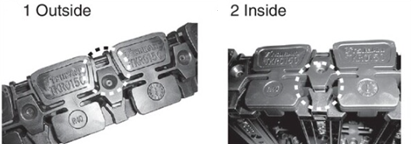
* Lock stay removal guide mark (driver mark)
For TKC34H25

For TKC47H36, TKC64H50, and TKC85H68
* Lock stay installation guide mark (link alignment mark)

For TKC34H25
For TKC47H36, TKC64H50, and TKC85H68
TKMK47H28
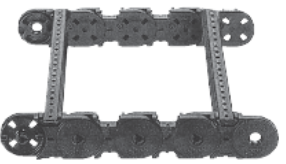
Concatenation

Align the direction of the connecting parts.
Overlap the connecting parts as shown in the image above and press down firmly.
When you hear a "snap" sound, the connection is complete.
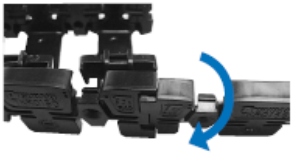
Decomposition
Remove the arm lock stay and separate the links by holding one side while twisting the other.
TKMK65H42, TKMK95H58, TKMK125H72
Concatenation

Align the direction of the connecting parts.

Overlap the connecting parts as shown in the diagram and insert the locking bolt into the center hole of the connecting parts.
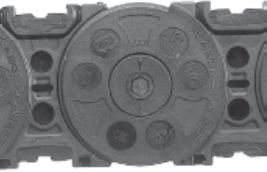
Rotate the locking bolt clockwise until you hear a click. (Check that the arrow on the end of the bolt is perpendicular to the longitudinal direction Cable Carrier (CABLEVEYOR).)
Decomposition
This is the reverse of assembly.
- 1. Turn the locking bolt counterclockwise.
- 2. Separate the links.
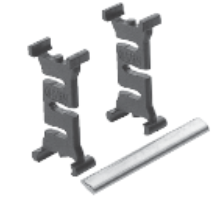
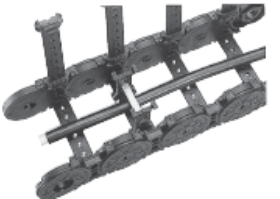
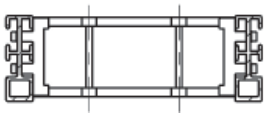
Assembly of TKMK and TKMT multi-stage partition plates
Concatenation
The numbered side of the vertical divider faces the outer periphery of Cable Carrier (CABLEVEYOR).
TKMK47H28, TKMT47H26
TKMK65H42, TKMK95H58, TKMK125H72, TKMT65H38, TKMT95H54, TKMT125H68
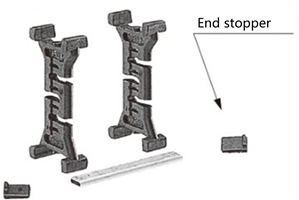
Insert the horizontal divider (with the wavy edge) into the slit in the vertical divider (make sure to insert it all the way in).
*For the DSB type, end stoppers are attached to both ends of the horizontal divider to prevent it from coming off.

Assembly is complete once the spacing between the vertical dividers has been adjusted to the specified length.
Open the arm with a flat-head screwdriver.
Set up the multi-stage divider board.
[Multi-tiered divider set]
- 1. Of the cables and hoses that will be partitioned in multiple stages, set the cables and hoses that will be placed on the inner side.
- 2. Place the multi-stage partition board (pre-assembled) on top of the cable/hose.
- 3. Place the cable hose to be set on the outer periphery on top of the horizontal divider.
- 4. Close the arm.
TKR15H22
Connection (the bracket installation procedure is the same)
Remove the arm and Inner link.
*Remove the part from the bracket on the extension side to the connection between outer link, and two more.
The outer link outer link are divided at the joints between them.
Connect outer link.
Attach Inner link to outer link.
*Insert the hook of outer link into the gap between Inner link.
(Outer circumference → Inner circumference)
Attach all Inner link to outer link on one side, then attach Inner link to outer link on the other side.

Cut outer link to get the desired number of links.
Attach the bracket to the cut part of outer link.

Attach the arm to the main body and bracket.
TKR20H28, TKR26H40, TKR28H52
Connection (the bracket installation procedure is the same)
Cut outer link to get the desired number of links.

Attach the bracket to the cut part of outer link.
Split

- 1. Use a flat-head screwdriver (tip width: 3.5 mm or less) to dig into the hole on the inner surface of the link in the direction of the arrow.
- 2. The lock between the links will be released and the links will come apart.
TKQ Series
Cable/hose insertion (set)
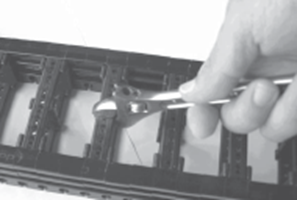
Remove the arm.
The arm can be easily removed by twisting it with an adjustable wrench.
Installing the partition
For partition plates, please refer to the partition plate installation for TKMK and TKMT types.

Insert the cable hose into place.

Close the arm.
Lightly tap the top of the arm with a plastic hammer to close it.
When shortening the overall length (extension is not possible)
Fixed end side
Remove Fixed end bracket.
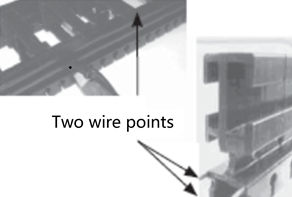
Cut the side bands.
There are two side bands on each side. Cut the wire with large pliers. After cutting the wire, bend it in the opposite direction to the bending direction to cut it. If there is an end piece at the cut point, remove the end piece.
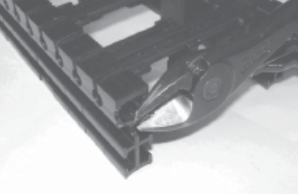
- Chamfer the cut section.
Chamfer the cut section using pliers or similar tools. If the chamfering is not sufficient, the metal fittings may not fit.

Be careful not to prick your hand with the tip of the wire.
Remove the end piece.
If there is an end piece within the third link from the moving end, the metal fitting will not fit, so remove the end piece. The end piece is attached with a star-shaped hole tapping bolt, so a special screwdriver is required.
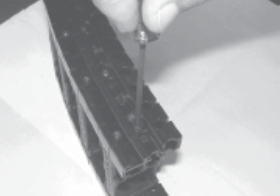
Connect the metal fittings.
Push the bracket into the side band and fasten the bolt with a hex wrench. Be careful not to turn the bracket upside down.
Moving end side
If the arm is more than five links from the moving end, it will be weaker and should be avoided. The shortening method should be the same as when shortening the fixed end.
TK type/TKH type/TKS type
Linking
Place the outer edge downwards.
Align the pin holes.
Insert the pin and secure the retaining ring.
Note)
Cable Carrier (CABLEVEYOR) has a bulge, so when the outer periphery is placed against the floor, both ends will rise. In this case, place sleepers on both ends and align the pin holes.
Cable and hose installation
TK type/TKH type (for split supporters)
- ・Remove the inner supporter. (If it is difficult to remove or install the supporter, it may be easier to first loosen the other bolt.)
- - Place the cable/hose over the half hole of the designated supporter.
- ・Attach the inner supporter and temporarily fasten it in place. Be sure to attach the removed supporter piece in the same position as it was originally (combination of the same symbols).
- *For integrated supporters, insert the cable/hose into the supporter hole from one end of Cable Carrier (CABLEVEYOR).
- *The supporter has a mark stamping on the outer periphery.
For TKS type
The inner bar can be removed by rotating it 90°.
Adjustment and tightening

Be careful not to twist the two links.
If cables and hoses are installed on an uneven surface, Cable Carrier (CABLEVEYOR) may twist or meander during installation, creating a dangerous situation.

